Prior to starting Cisco Access point configuration we have to verify the following:
- The access point is running in Autonomous mode:
Read – https://wyfi.ca/2019/08/09/convert-cisco-ap-to-autonomous-mode/ - The SSID name and password/key.
- The Security configuration of the infrastructure.
Topology:
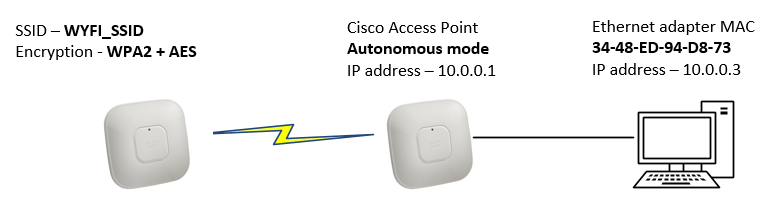
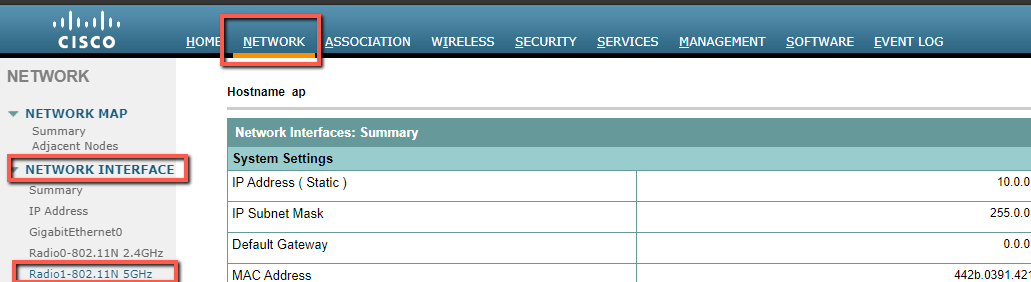
Note: Default cisco Access Point IP address is 10.0.0.1.
To access Cisco Access point your PC should be in the same subnet
(example 10.0.0.3 / 255.255.255.0)
Configuration Steps:
- Login into the access point (default login – cisco/Cisco)
- Go to Security tab -> select Encryption Manager
Under Encryption mode select your encryption :
Note: For WPA2 select Cipher -> AES CCMP
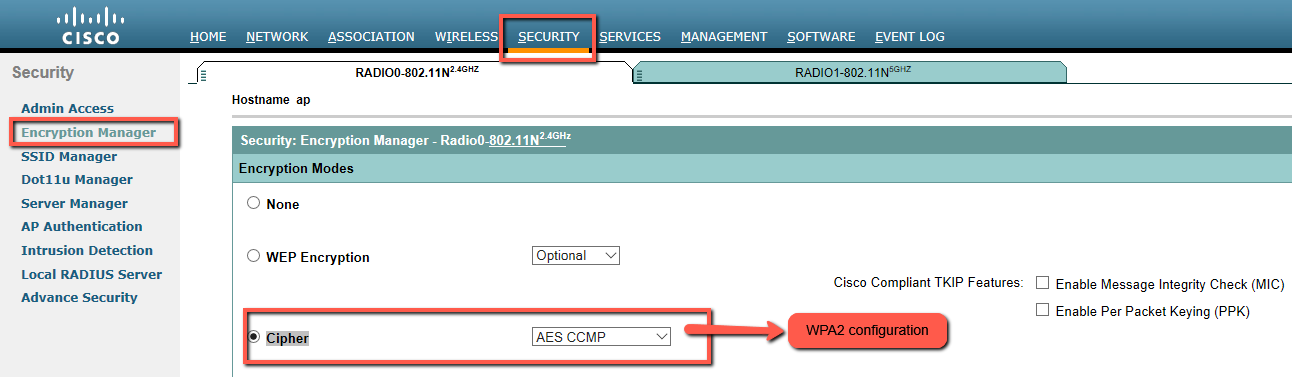
3. Apply and Save configuration.
4. Configure your SSID (your home or enterprise) and radio that you want your bridge to associate/connect to.
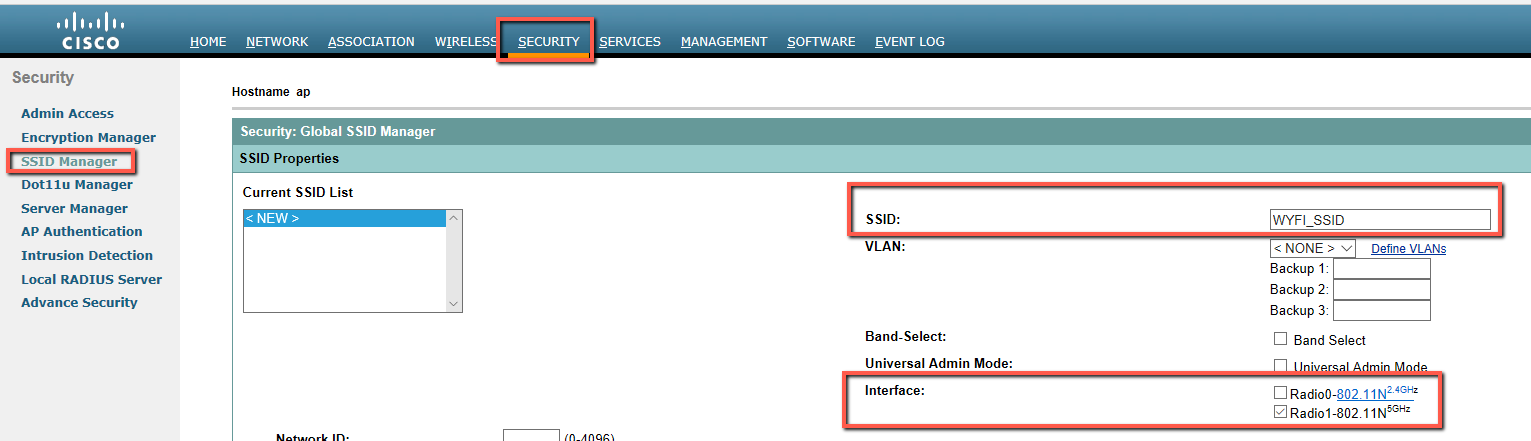 5. Set your password/key

6. Apply and Save configuration.
7. Enable 5Ghz interface and change the Access point mode to Universal Workgroup Bridge mode.
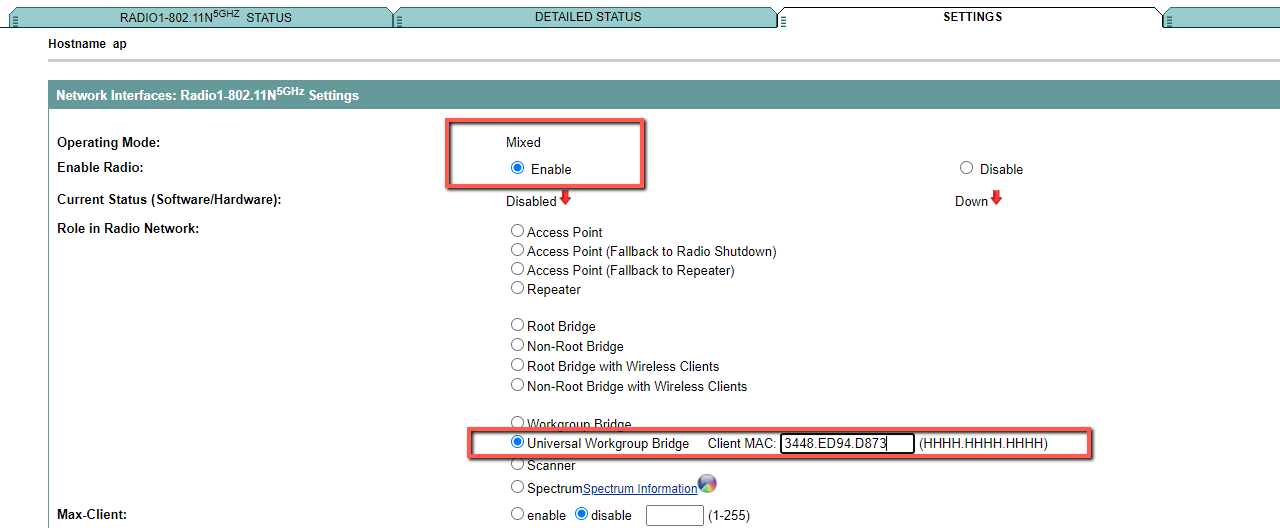
In the Client Mac address field we have to add a host address in the following format – XXXX.XXXX.XXX
8. Apply and Save configuration.
9. If your Access point is successfully connected – the LED color will be changed from Green to Blue.
From the console:
%LINK-6-UPDOWN: Interface Dot11Radio1, changed state to up
%DOT11-4-UPLINK_ESTABLISHED: Interface Dot11Radio1, Associated To AP e4aa.5d9c.73ac [None WPAv2 PSK]
%LINEPROTO-5-UPDOWN: Line protocol on Interface Dot11Radio1, changed state to up
Reference:
https://wyfi.ca/2019/08/09/convert-cisco-ap-to-autonomous-mode/
https://kb.netgear.com/227/What-is-a-wireless-bridge